Hatching eggs from your own chickens can be a fun and cost-saving activity for any chicken keeper. While you can order eggs from various hatcheries and breeders, hatching your own eggs is a further step towards building resilience and self-sufficiency. It makes you independent of availability and price fluctuations, and gives you complete control over the quality of your birds.
You need to have a rooster with your hens in order to have fertilized eggs that will hatch into chicks. But if you don’t own a rooster, you can still buy fertilized eggs and skip forward to Tip #4 to increase your success.
Collecting hatching eggs from your hens is not particularly complicated. But you can greatly improve your hatching success if you follow these important hatching tips:
1. Breed only your best hens
While it may seem simpler to just randomly gather eggs from your flock and plunk them into an incubator, you can actually start to improve the quality and performance of your flock over time if you practice some quality control right from the start.
Think about it this way. It costs just as much to feed a hen that is a poor producer and prone to health issues, as it does to feed a super-star hen that always lays eggs, never suffers from parasites or disease, and is calm and easy to handle. Which type of birds do you want in your flock?
You can influence the characteristics of your flock by carefully selecting your breeding hens for the very best traits and behaviors that you wish were present in your whole flock.

You might consider things like:
– How well has this hen laid in the previous season or over the winter?
– What kind of body condition is she in right now?
– Has this hen been laying for more than two weeks?
– Is she a good representative of her breed and the right size for what you want?
– How closely is she related to the rooster (see Tip #2)?
– Has she been sick? Or is she particularly susceptible to parasites?
– Is she calm and easy to handle or high strung and flighty?
Once you have decided which hens constitute your “best”, then move these birds to a pen where you can be sure the only eggs you collect are from these best birds. This way all the chicks that hatch will be from your best hens, and they will (in all probability) be an improvement over the rest of your flock. Repeat this process over time, and you begin to shape your flock into top performing birds for your particular management system and climate conditions. This can result in significant cost savings over time.
As a rule of thumb, shoot for breeding from the top 10% or less of your flock. These “best of the best” hens will promote whatever characteristics you are using to choose your breeding hens in the next generation of birds.
2. Breed only your best rooster
Choosing a flock rooster for the production of chicks is a very important decision! Roosters make up 50% of the chicks’ genetics, and because they breed with many (all?) of the hens, whatever rooster you choose is going to be a dominant part of your next flock! Therefore it pays to put a significant amount of thought into which rooster is going to lead the flock.
It’s important to consider things like:
– Is the rooster a good representative of his breed and the right size for your purpose?
– Does the rooster treat the hens well? Does he dance? Call them to feed? Sound the alarm?
– Is the rooster at all aggressive to people?
– How closely related is the rooster to the hens?
– Did the rooster come from a productive hen?

A breeding rooster should exhibit the best traits of his breed, be strong and confident, but not aggressive in behavior. These are essential elements for a top flock rooster. Ideally the roosters should be unrelated to the breeding hens, or distantly related, so that you are not practicing inbreeding which can lead to increased recessive traits.
If you have been breeding for a while, and track your birds, then the rooster you choose should be from a productive, high quality hen. For example if choosing a Marans rooster, it pays to choose one from a hen that produces the darkest brown eggs you have in the flock. In this way you are increasing the odds of maintaining the dark brown egg trait. Similarly, if you raise Americanas, it pays to choose a rooster from a hen that produces the bluest eggs, thereby enhancing that trait throughout the flock.
In my opinion, the best roosters are also the ones that dance for their hens and treat their hens well. Hens that are with such “good” roosters tend to be more productive.
I NEVER breed a rooster that is aggressive towards people or that is hard to handle. It is safe to assume that at least some component of this behavior is genetic and will be passed on to the chicks. In contrast, continuing to breed docile roosters over time can lead to birds that are lovely to work with and easy to manage. To me, this is essential to my own enjoyment of raising chickens.
How Many Hens Per Rooster? Once you have chosen your breeding rooster, move him in with your best hens. Roosters vary in how many hens they can successfully breed at one time. If you set hatching eggs and discover many are infertile then your rooster might need replacing or you have given him too many hens to work with. For the purposes of collecting hatching eggs, I typically have between 1 and 10 hens with a chosen rooster depending on how closely I want to track specific pairings.
3. Wait at least 2 weeks if you have a new rooster
If you have recently changed roosters for the purposes of creating a good breeding match, you need to wait a minimum of two weeks before you begin collecting hatching eggs from this group. This is to make sure that you are actually getting the cross with the chosen rooster, and not still having eggs that were fertilized by the past rooster of the flock.
Hens do not have to be bred every day to produce fertilized eggs. Hens can store sperm and continue to produce fertile eggs for quite some time after a rooster is removed. Although the actual fertile window can vary widely for an individual hen, on average a two week waiting period is sufficient to ensure your chosen rooster is the sire.
4. Choose only well-formed, clean eggs for hatching
Eggs are egg-shaped for a reason! Avoid collecting hatching eggs that are:
– Too large or too small for the breed you have
– Double yolked (rarely viable)
– Too round, too pointy, or otherwise misshapen
– Poorly colored (may indicate an issue with nutrient content)
– weak shelled (may indicate an issue with nutrient content, and these are likely to break)
– Cracked or chipped (will dry out too fast, and/or break or explode when incubated)
– Dirty (rarely hatch and may contaminate the incubator)
Once you start collecting eggs it is critical to keep only high-quality eggs for hatching.
Overly large or small eggs often do not perform well for hatching. Double yolk eggs usually fail to produce chicks. Dirty eggs may contaminate the incubator and lead to poor hatch results. You are really looking for well-formed egg-shaped eggs! It is definitely easier to decide which are the best eggs when looking at a dozen in an egg carton – then you can easily see which eggs are out of the ordinary.
If temperatures outside are below zero (32oF) or above 30oC (86oF) you may need to collect hatching eggs multiple times a day to preserve their quality and hatchability.
Do not wash eggs meant for hatching or store them in a refrigerator. These actions will damage the eggs and make them unhatchable.
It is a good practice to collect more eggs than you need so that on the day you set them in the incubator you can pick and choose the best ones for hatching. I always consider the quality of the egg, as described above, and the date of collection, when choosing the final selection of eggs to hatch. The highest quality eggs from the most recent collection dates are the winners and will lead to highest hatching rates.

5. Store hatching eggs properly
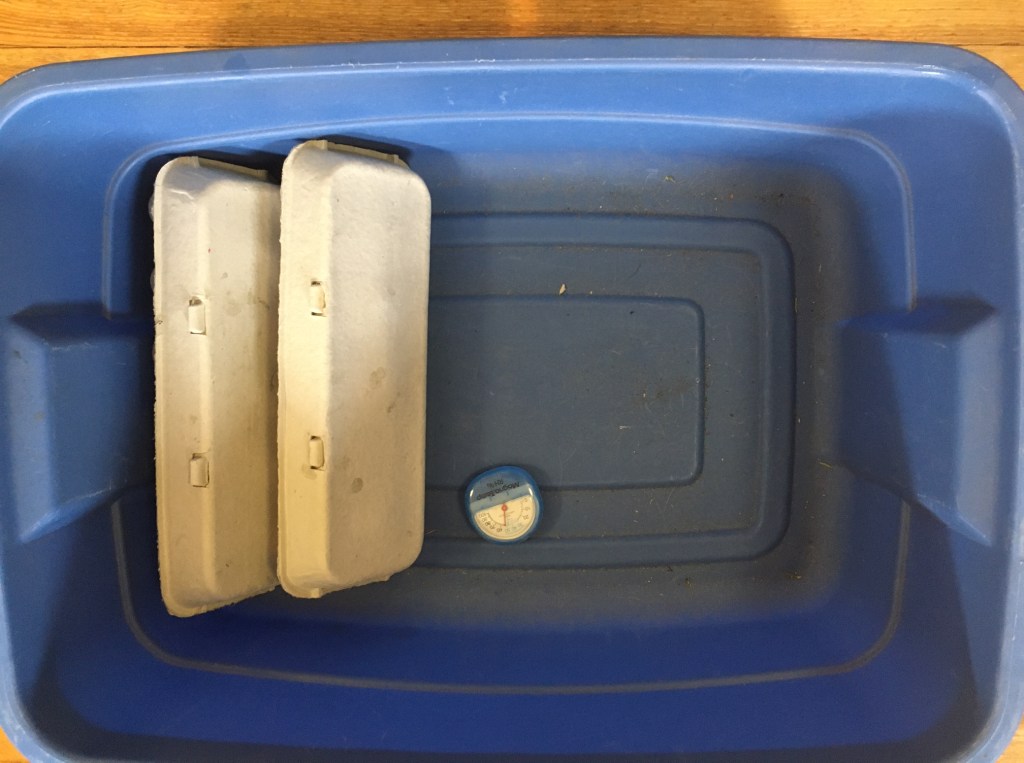
Eggs meant for hatching need to be stored in a moderately cool area with good humidity. That means a temperature of about 12oC (55oF) and humidity of at least 60% (55-75%). This is not hard to achieve. I like to use a flat 37.8 L (10 US gallon) Rubbermaid container with a lid for storing hatching eggs. Make sure to place the container away from direct sun or heat sources.
Hatching eggs must be stored with the pointed end of the egg down. The opposite end (blunt end) of the egg has the air sac which plays a critical role in chick development. The air sac allows gases to be exchanged between the embryo and the air. It also provides an indication of how much moisture is being lost from the egg over time (the air sac grows larger over time).
I put my hatching eggs into an egg carton, pointed end down, which holds them easily in the correct orientation. Then I place the egg carton inside the rubbermaid container to wait until I have gathered enough quality eggs to fill my incubator.
Handle hatching eggs with great care. Too much disturbance (e.g. shaking, jostling) causes the air to distribute in the egg and this reduces the chance of having a successful hatch. This is also why shipped hatching eggs must settle for at least 24 hours, and may have reduced hatching results.
Adjust Humidity: You can adjust the humidity inside a Rubbermaid container very easily. I have an inexpensive hygrometer that measures humidity levels. Often simply adding the fresh eggs into the closed container is sufficient to achieve a 60% humidity rate. But if the meter shows the humidity is low, I just add a small container of water alongside the egg carton in the rubbermaid bin. Then if the humidity gets too high, I can just remove the container of water and/or vent the lid a bit. You could also simply add a damp paper towel instead of a container of water with similar results and flexibility.
Turn the eggs in storage: Eggs that are waiting to go in the incubator still need to be turned daily. Turning the eggs helps prevent the developing embryo from sticking to one side of the shell which would reduce hatchability.
If you are storing your hatching eggs in an egg carton, pointed end down, then the simplest way to achieve this small movement is to prop up one edge of the carton, tipping the carton at a 45o angle. You can place a small piece of wood (or other materials) under the long side of the carton to tip it to the left. I can usually just prop the carton against the end of the Rubbermaid for similar effect. Then the next day, you shift the prop so the carton now angles to the right. Each day you shuffle the carton left or right.

Continue collecting and storing hatching eggs until you have enough to select only the best eggs with which to fill your incubator. (You can find tips on which incubators I use in this post). Hatching eggs stored as described can be held for two weeks or more and still have excellent hatching rates. Just keep in mind that hatchability declines with the age of the egg and the amount of moisture the egg has lost in storage.
My egg storage process in detail – one more time:
So to be clear, the process of storing hatching eggs works like this for me. I set up my Rubbermaid container where I will store the eggs. I collect fresh eggs and ensure they are not cracked or dirty. Without washing or any further handling, I load them pointed end down in an egg carton. I usually write the date and source of the eggs on a slip of paper that I keep with each carton. I put the carton into the storage Rubbermaid angled to the left.
The next day I collect more hatching eggs. I add the chosen eggs to the carton, pointed end down. I write on my paper to record the date and source. Then I return the carton to the Rubbermaid angled to the right. I check the humidity and add some water if the humidity is lower than 60%.
The next day I collect more eggs . . . .the process continues, adding eggs to the carton(s) and storage container until I have enough so that I can pick and choose the best eggs to fill my incubator(s) for a hatch.
6. Test your incubator!
I cannot emphasize enough just how important it is to test your incubator before you are ready to set the eggs! This is especially true if you have just purchased a new machine or if you are taking an older one out of storage.
Set up the machine according to the manufacturer’s directions and let it run for at least half a day or longer before you load it with eggs. This allows you to make sure the temperature, humidity and turning features are all working correctly before you put your eggs in. Issues with any of these mechanisms can spell disaster for your eggs and the hatching results, so be wise and get the machine set up early!
Want to hatch using a Hen Instead?
If you want to use a broody hen (instead of an incubator), you first have to have one available!
Broody hens are a rarity these days because “broodiness” (the desire of a hen to settle and hatch eggs) has been bred out of many chickens breeds over time. This is because when a hen goes broody she stops laying eggs and this is considered a bad behavioral trait for commercial egg producers who want maximum egg production not chicks. On a farm or small-scale operation, however, broody hens are valuable egg-hatching/chick rearing assets!
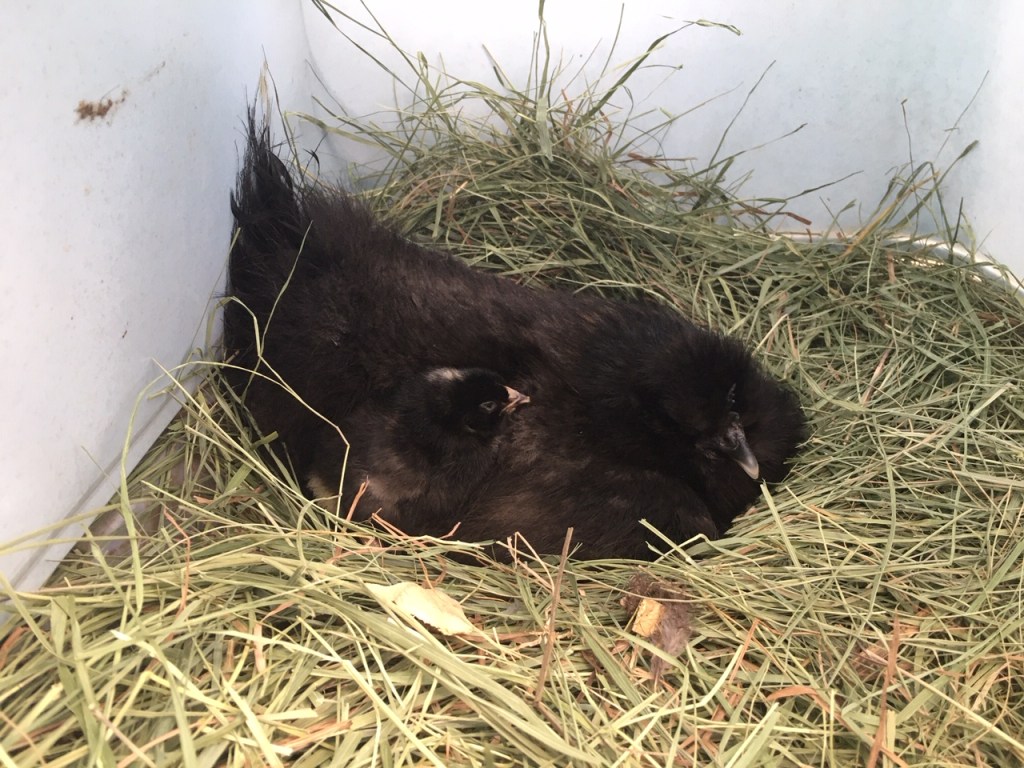
If you have a hen that is spending all her time in the nest box (a good indication of broodiness), then you can swap out whatever eggs she is sitting on for your carefully selected eggs. It is often best to do this at night, or when the hen is off the nest having a break. Typically the hen will accept the eggs without any problems and continue to sit on them. She will do the work for the next 21 days to incubate the eggs, and monitor the hatching. The less you disrupt her the better.
It’s a good idea to have the broody hen set up in whatever place you want her to hatch the chicks. Personally, I haven’t had good luck trying to move a broody hen to a new location, although other people seem to do this successfully. So, my advice is to make sure the broody hen is where you want her to be when the chicks hatch. That way you will not risk her abandoning eggs at an inappropriate stage or losing chicks in a pen not set up to keep tiny birds from escaping.
I have used both hens and incubators to hatch eggs. There are pros and cons to both methods. Choose the one that suits your desired hatching goals.
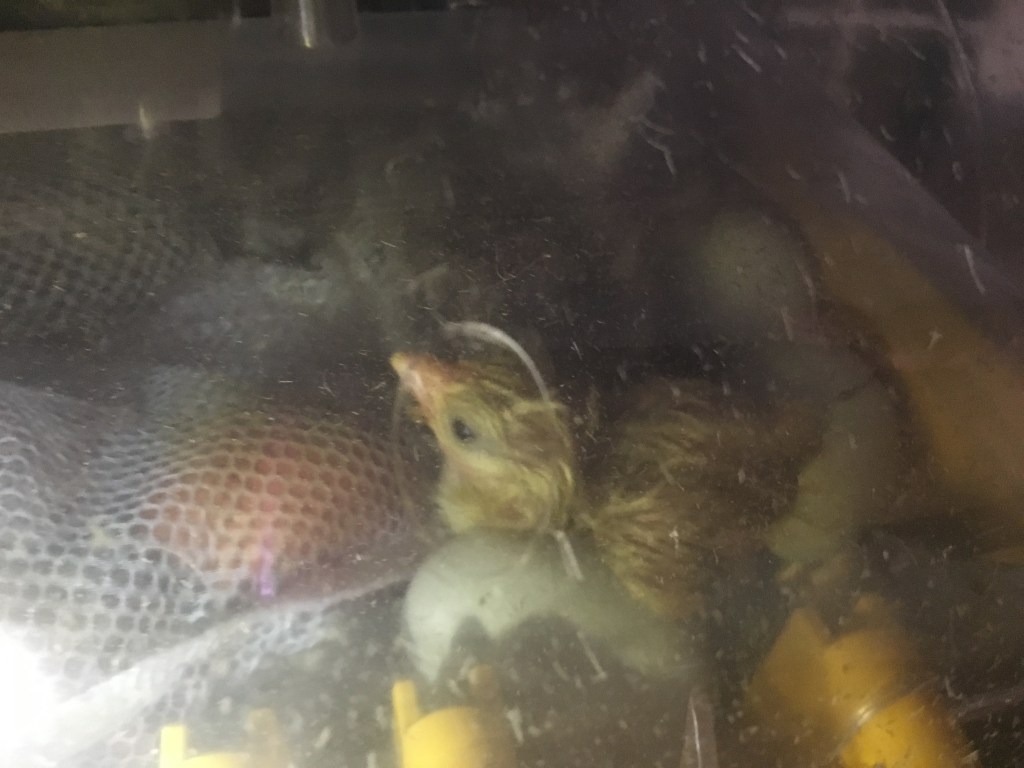
7. Candle the eggs when you set them
Regardless of whether you are using an incubator or a broody hen to hatch your collected eggs, it is a very important to candle them first.
Candling is where you use a light to see through the shell of an egg and check for cracks, chips and obvious signs of infertility. I like the Brinsea candler for this job. This step can save a lot of frustration from having cracked eggs explode in the incubator. In some cases (for lighter colored shells) it may also allow you to remove infertile eggs from the batch and thus make room for eggs that are more likely to hatch.
Candling is a bit of an art. There are some good guides for candling eggs that show you exactly what to look for. Don’t be discouraged if you try it and can’t tell what you are looking at in the beginning. It does get easier the more you do it.
I find it easy to determine infertile eggs for light shelled Americanas and Silkie eggs. It’s a bit more challenging for the brown eggs of Barred Rocks. And I find it next to impossible for the very dark brown eggs of my Marans. I just do my best, and I make sure there are no chips or cracks.
And then – Happy Hatching!
It takes 21 days to incubate the eggs. Follow the instructions on your incubator for how to adjust the settings and what to do as the hatch day approaches.
Just remember that eggs typically hatch out in a 50:50 sex ratio, meaning half of your chicks will be roosters. It’s a good idea to plan ahead for what you will do with those extra roosters before you find yourself overwhelmed with crowing birds.
Once your new chicks start to grow, it takes about 24-26 weeks for the pullets to start laying their first eggs. And there you have it – full circle! You are now producing eggs and chicks from your own stock!
Collecting your own eggs and hatching chicks from your own flock is a rewarding experience. It can lead to great food independence and enables you to adapt your chickens to your particular circumstances . . . and it is so addictive! Happy hatching!
Looking for Resources?
Not all products will stand up to life on a farm! For recommendations on products that have withstood the rigors of Rose Hill Farm, check out my Shop for Products page. I will work to keep it updated with my latest findings on useful products for farm life.
Find this useful? Subscribe using the sign up box below to get the latest Rose Hill Farm and Three Chickens Strong news.