

Saving seed from these plants can give you fresh sprouts all winter long!
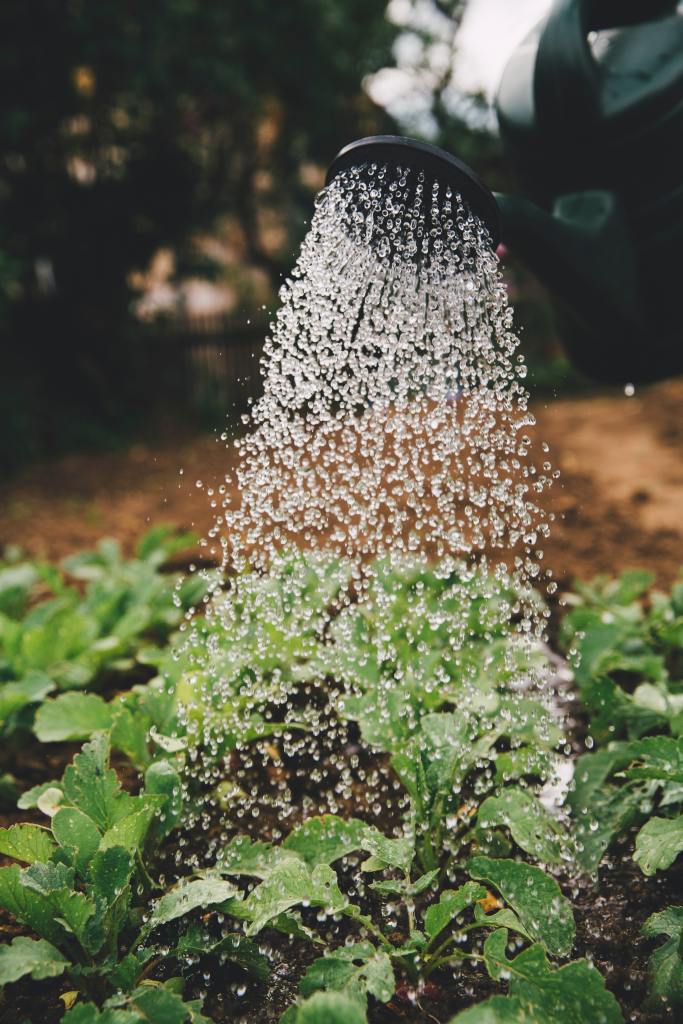
Although the world feels pretty crazy right now, with the Coronavirus (Covid-19) pandemic re-shaping our world at break-neck speed while we stay at home, gardening can provide both a comforting activity and fresh food for the table. It’s a great way to beat the self-isolation blues and do something that will boost your immune system!
Anyone with even a little bit of space can start a food garden and benefit from fresh greens through the summer and into the fall.
But with a just little bit of extra planning, you can stretch the supply of fresh greens right through the winter!
Now is the perfect time to plant a little extra for seed saving, and reap the benefits of sprouting later this year.
Sprouting with Benefits
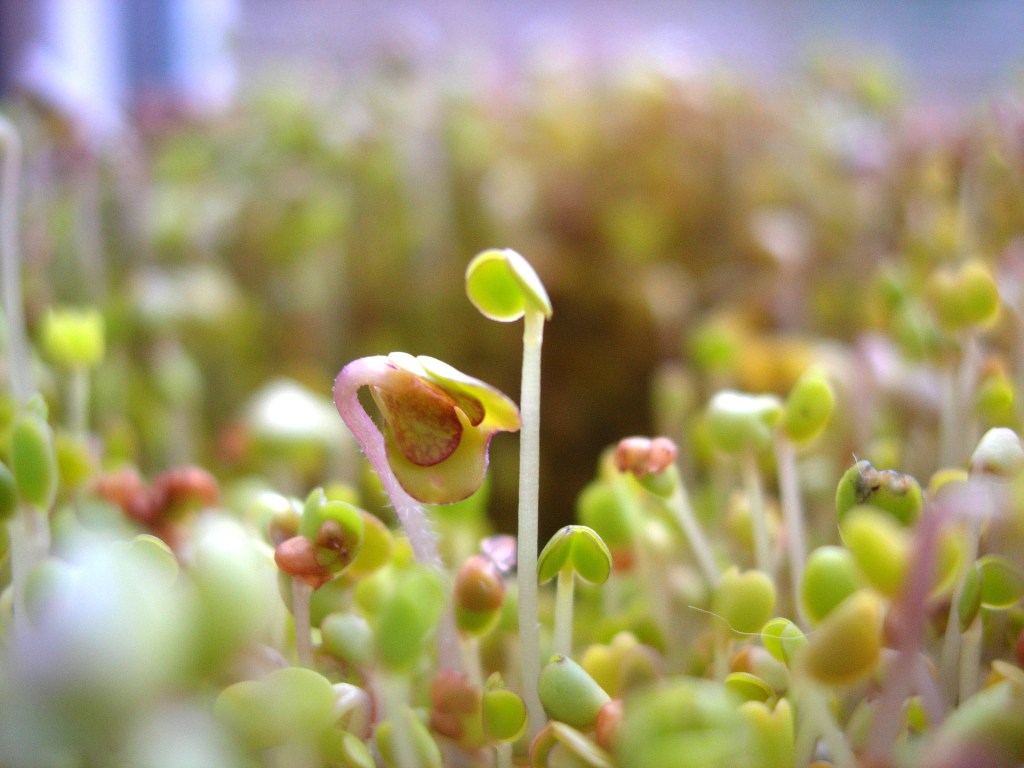
Sprouting seeds are super-greens, packed with amazing health benefits. They contain all the nutrients required to grow into your favorite vegetable, except held in one tiny little seedling. They are simply bursting with life.
Most people think about bean sprouts or alfalfa sprouts when they think about sprouting, but in reality, there are a wide range of vegetables that make easy and nutritious sprouts.
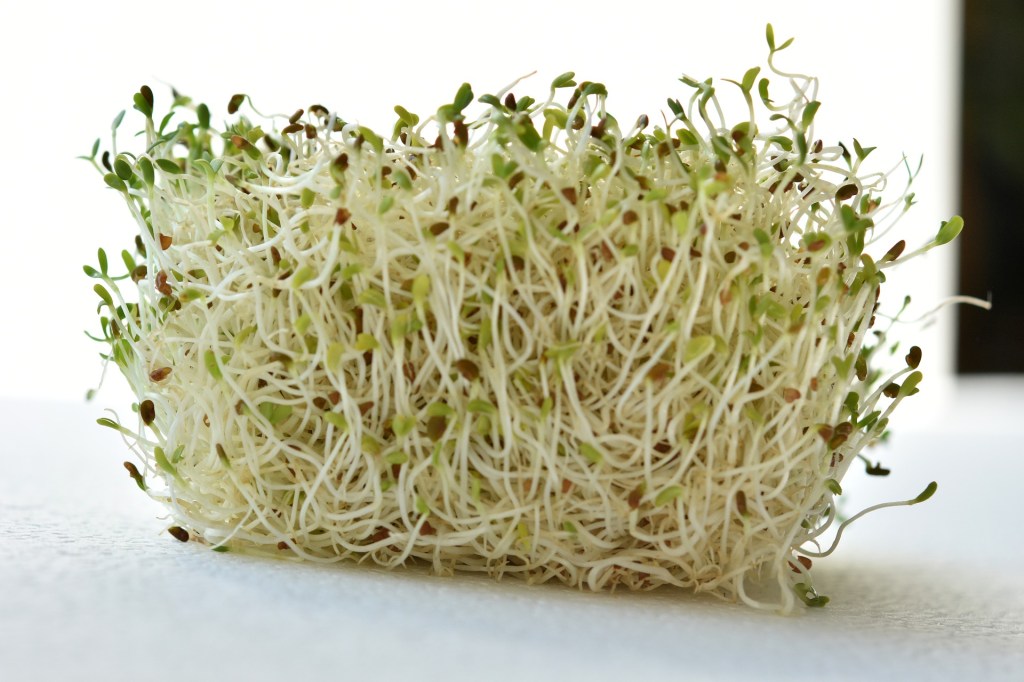
Sprouting seeds can be grown one type at a time (e.g. classic alfalfa sprouts) or blended into salad ready mixes that include tangy, savory, or spicy overtones for your sandwiches, salads and meals.
The most disappointing thing, however, is how shockingly expensive sprouting seeds can be if you try to buy them from a seed catalogue or specialty food store. The cost can be a real deterrent to accessing one of the easiest winter greens that can grow right on your kitchen counter.
If only there was a better source of sprouting seeds?
And lucky for us all – there is!
Grow Your Own Seed Supply
There are a number of vegetables that you can grow in your garden that produce enough seeds to supply BOTH your own garden seed for planting AND seeds to sprout for your winter meals. Win-win!
Saving seeds for you own fresh sprouts has many benefits. It can:
- Provide you free seeds for sprouting over the winter;
- Provide you with free seed for planting those same vegetables in the following years;
- Ensure you won’t be disappointed trying to find your favorite variety in the seed catalog ( Don’t get caught waiting 30+ days for a seed order delivery); and
- Help with local and regional adaptation to climate changes.
Most people don’t realize that the seed collected from even one or two plants provides enough planting seed for several years (and in some cases for a decade!). You can, therefore, take the excess seed you produce and use that for nutritious sprouting in the winter to boost your access to fresh greens. It is that easy!
Sprouting Seed = Vegetable Seed
The simple fact is that seeds sold for sprouting – the kind that you soak in jars or sprouting systems to create edible green shoots – are not different from the seed you plant in the ground to grow that same vegetable.
Sprouting seeds are simply a cleaned selection of regular vegetable seeds, often sold at premium prices. The types of vegetables chosen as sprouting seeds are not magical either – they are simply types that sprout quickly and easily, and provide a tasty edible shoot.
Some sprouts must be cooked before being eaten, such as classic bean sprouts (which are actually mung beans) and soy bean sprouts. Others can be eaten cooked or raw, such as pea shoots and sunflower sprouts. And others, like mustards and radish, act like mini-salad greens. No matter how you use the sprouts, they provide added nutrition to your meals which you can have for free if you add just a few extra steps in your gardening routine.
Before we get to the 6 Easiest Plants to Save Seed From For Sprouts . . . . . Let’s look at how easy it is to make this happen in your own garden.
Saving Seeds For Sprouting in 7 Easy Steps
Let’s work through an example using the first vegetable on my list of 6 easy vegetables: Pac Choi.
Pac Choi is a wonderful Asian green (Brassica spp.) that is typically used in stir-fry. It is high in Vitamin C, beta carotene, folic acid and calcium, and it is VERY easy to save seed from!
1. Plant It!
In loosened, well-drained spring soil, plant the Pac Choi seeds about 1/2 – 1″ deep and about 1″ apart. I prefer to plant using the Square Foot Gardening Method (see the Resources section at the end for a link) to avoid excess weeds and to maximize yields. That means I prepare my soil one square foot at a time, for as many squares that I want to plant Pac Choi in. For me that is usually about 3 square feet total planted at any one time. For a continuous supply of Pac Choi to eat, I will plant additional squares of Pac Choi about 2 to 3 weeks apart throughout the spring.
I like to make 9 planting holes in each square foot where I want to plant my Pac Choi. I add 3 seeds per planting hole, and lightly cover with dirt. Water well.
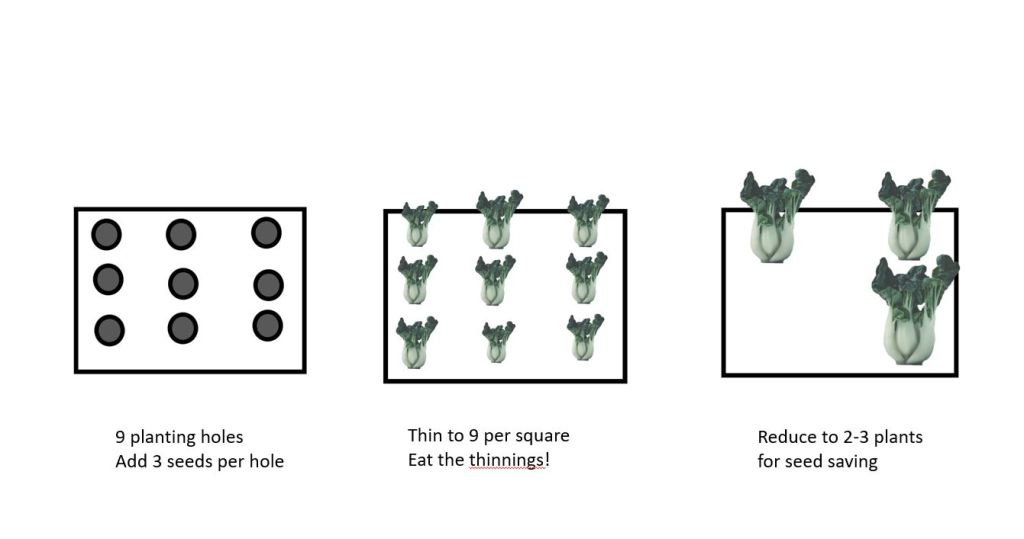
2. Thin the Plants
As the plants grow, thin down to 1 plant per planting space or 9 plants in a square foot. The thinnings make great additions to your meals. Eat them up – Yum! This is your first harvest for your efforts.
3. Eat Some . . . But Don’t Eat the Best Plants
As the plants get bigger you can start harvesting outer leaves , or wait for the picture-perfect pac choi heads to form. But don’t eat the best plants! This can sometimes be the hardest part of seed saving if you have not planned ahead!
It can be so tempting to eat those beautiful plants, but they are the key to your long term success. You need to keep 2 or 3 of your best plants and let them fully mature. These are the ones you will let flower. The plants will produce a flower spike out of the center of the plant. This is known as “bolting to seed”.
Important Note: If you have lots of room, and therefore lots of pac choi plants to choose from, you Do NOT want to save seed from the first few plants that send up flower shoots. These are the “early bolting” individuals and this is an undesirable trait for greens. Instead, remove the early bolting plants to the compost or use them as backyard chicken feed. Save the seed off the plants that bolt later, which will promote “late bolting” as a trait in your future crops.
4. Cut the Seed Pods When They Start To Dry
Once the flowers are finished, the seed pods will form. When the seed pods have rounded out and are starting to turn yellow, take shears and cut the main flower stock from the plant. Place the whole seed head into a large paper bag with the pods in the bottom and the main stock sticking up out of the bag.
Tips For Success:
(1) It is critical to make sure the seeds are fully mature before cutting the stock. If you cut too soon, the seeds will be too small and won’t be viable. You should always test the readiness of the pods by opening one or two. The seeds should look nearly the same as those you originally planted, but perhaps are not as dark in color.
(2) It is also important not to cram too many seed heads into one paper bag, otherwise the pods may rot instead of dry properly. Use several bags as necessary to contain your harvest seed heads so they have room to continue drying while in the bag. Never try to harvest seed heads after a rain. Wait until the plants have air dried again before snipping the heads.
5. Store in a Warm Dry Place To Finish Curing The Pods
Place the paper bags in a warm dry place and prevent any exposure to moisture while the seed pods are drying. Exposure to moisture at this point could ruin your harvest. Remember, it can take anywhere from one week to several weeks for the pods to finish drying completely depending on how close they were to being dry when you cut them.
I like to put my bags of drying seed pods on a high shelf, or clip them to a clothes line strung in a back room.
6. Harvest the Seed
Seeds are ready for harvest when the pods shatter easily in your hand. Gently rub the pods together right in the paper bag, or remove handfuls of pods to rub together over a large bowl. The seeds and shattered pods will collect down into the bowl or the bottom of the bag.
When you are finished breaking open the pods, simply pour all the seeds and pod-bits into a clean shallow bowl. Swirl the bowl repeatedly to stir the seeds round and round. This will make the loose pods to float up over top of the seed which is heavier and will sinks to the bottom. Gently scoop the debris off the top, leaving the valuable seed in the bottom of the bowl.
7. Store the Seed
Pour the cleaned seed into a glass jar or other storage container. I usually take about 1/2 to 1 tsp of seed out of the jar and set this aside in an envelop as planting seed, to be stored with my other garden seeds. Keep in mind that you only need 9-27 seeds per square foot for the vegetable growing part of this equation – the rest of the seed you can eat! Label the jar with the vegetable name and year of harvest, and put it in the kitchen cupboard for sprouting.
Bonus Tips That Save Time:
Just Store The Whole Bag:
If you are short on time, you don’t actually have to clean the seed from the pods ahead of time. I often simply wait until the bags holding the seed pods are well dried and then I crunch the pods down into the bag with my hand. I remove the main stem, compress the bags some more, and store them all together in a Rubbermaid bin in a cool dry place (like the back of a closet). Don’t forget to write the type of vegetable and year on each bag so you don’t lose track of what seed it holds. Then process the seed whenever you have spare time.
Leave The Small Debris Until Later:
You also don’t have to spend hours rigorously cleaning the seed until it looks like the kind you buy in the store. While it is pleasing to see such beautifully cleaned seed (and you could try winnowing with a small fan blowing), you will end up washing the seed when you use it for sprouting anyway. That means you don’t necessarily have to remove all the fine debris in advance. This can save a lot of time and mess if you are trying to collect the seeds indoors.
Roll It If You Have A Huge Harvest:
If you have a LOT of pods to process, the simplest thing to do is get a shallow cardboard box or container that will accommodate a rolling pin. Add pods to the shallow box a few handfuls at a time and use the rolling pin to crush them, rolling back and forth across the pods to make them shatter. Gently shake the box to concentrate the seed into one corner and pour off the seed, while holding back the pods and debris with one hand. Then repeat with more pods. When you have finished a large batch of seed, you can put it in the shallow bowl and swirl it around to float the remaining large debris up over the seed for easy removal.
The 6 Easiest Sprouting Seeds to Grow Yourself
By now you must be dying to get started growing your own sprouting seeds! So what are my top 6 picks for the easiest winter sprouts?
Without further ado, here are my top 6 picks for easy seeds to save for sprouting:
Pac Choi (Chinese cabbage)
Mustard Greens
Arugula (Rocket)
Daikon Radish
Broccoli
Kale*
Each one of these vegetables is great in the garden to eat AND incredibly easy to save seed from! These plants produce large amounts of seed in pods that are easy to harvest, dry in paper bags and separate with simple rubbing methods to release the seeds. They area also all small-seeded vegetables, so you don’t need a lot to make a jar full of nutritious sprouts.
The first 4 vegetables: Pac Choi, Mustard Greens, Arugula and Daikon Radish – are all simple to grow and the plants easily bolt if left in the growing in your garden. Each one will send up a central flower stock (as described in the Pac Choi example) that will eventually produce seed pods you can harvest and dry. Each of the pods is filled with the seeds you need for sprouting or growing vegetables. Radish pods can sometimes be tricky to break apart by hand, but they usually roll easily using the rolling pin method.
Broccoli is slightly different. The flowers of broccoli come from the heads we like to eat. You can usually still harvest the main head of broccoli to eat and leave the rest of the plant in the ground. It will eventually send up side shoots that, if you resist harvesting those for supper too, will turn into yellow flowers that will develop into seed pods. Harvest the seed pods when they are fully formed and start to yellow. You should always crack a few open to be sure that the seeds inside are nearly ready before cutting the stocks for drying.

(Image by Shutterbug75 from Pixabay )
One key thing with growing broccoli for seed is that you must start early in the spring if you want the seed to mature before winter. It can take all season for broccoli to produce seed pods that are mature enough to cut and dry in a paper bag. It is also important to use an open pollinated broccoli variety because some hybrid types do not produce viable seed for sprouting (at least in my experience).
Kale is the only outlier on my list. Technically Kale is a biennial, meaning it doesn’t normally produce seed until it’s second year. That means you have to leave some kale in the garden overwinter. Even if it dies back, it will usually have enough energy to re-grow in the spring and produce flowers, then seeds. While this may seem like extra trouble, kale produces vast quantities of seed. This means you may only have to produce kale seed every few years to enjoy these wonderful sprouts. I am particularly fond of Russian Red Kale as my go-to for leafy greens and copious seeds for winter sprouts.
A Few Things to Avoid
The biggest pitfall when you are just starting to save seed for sprouting is cutting the seed stalks too early, resulting in non-viable seed. The seed stalks have to be fully mature before you harvest them (cut them off the plant), otherwise the seed is useless and you’ve wasted your time. If the seed is not properly mature, it won’t grow.
The second biggest pitfall is to overestimate how many plants you need to keep for seed. When you are first starting out, it is natural to think that you need to let all the plants go to seed. But the reality is each plant produces a so much seed that, depending on your sprouting habits, you may only need to save seed once every few years. Just keep your planting seeds stored in a cool dry place and you are all set.
Thirdly the amount of seed you need for a sprouting jar varies depending on the vegetable. While you might need 1 or 2 Tbsp of large seeds like peas or sunflowers, it can take 1 or 2 tsp of small seeded vegetables per jar to produce copious amounts of sprouts – sometimes as little as ½ tsp will do the trick. Overfilling the sprouting jar can lead to disappointing results. Experiment and see what works best in your kitchen.
Using Your Sprouting Seed
When you are ready to make some sprouts, start by using ½-1 tsp of seed in a clean canning jar, or your sprouting system. Make sure that all the large debris has been removed because that could trigger mold if left in the jar. Add an inch or two of warm water and swirl the seeds in the jar. Give the seeds 5 or 10 minutes to wet and sink to the bottom of the jar. Then you can swirl the water again and pour off any debris. Add more water so that all the seed is covered by about an inch of clean water.
You can continue soaking the seeds in water for up to 8 hours (overnight), or you can drain and let the seed sit for 24 hours before rinsing again. Experiment with which method works best in your environment since everyone’s home is different in terms of temperature and humidity.
Most seed sprouting advice suggests you rinse and drain your sprouts at least once each day with warm water until they are ready to eat. It can take anywhere from 1 to 7 days for the sprouts to be ready.
Typically sprouts are ready when the first pair of leaves has opened and the seed shell has fallen away. If seed shells are still clinging to the sprouts, you can wash them off with a gentle rinse of water or soak the sprouts in water so that the shells float up to the top for removal, then drain.
Remember that if your sprouts are too pale, exposing them to indirect sunlight can speed up the greening process and increase their nutrient value.
Then happy eating!
Add your sprouts to your favorite meal! Try mixing different combination of seeds to create your own favorite mix.
Growing your own seeds for sprouting is a fun and economical way to extend your supply of garden greens all through the winter. It can give you some peace of mind knowing you have easy access to some of your favorite foods. Pac choi, mustard greens, arugula, radish, broccoli and kale offer fast and easy seed saving opportunities for gardeners of every skill level. Try them all this year!
Resources
Looking for some suggestions on sprouting equipment to get started? Here are some of my favorite tools or check out my Shop for Products page:
Square Foot Gardening 3rd edition, 2018 – by Mel Bartholomew
Sprouting lids for canning jars – these handy lids make sprouting easy and you can use your own jars!
Biosta Sprouter – this is my favorite and the one I use most in my kitchen
And if you want to try something just a little bit different, check out how to make “soil sprouts” with Indoor Year-Round Salad Gardening by Peter Burke. I simply love this method of sprouting for peas, sunflowers and even mustards and kale.
Want to grow your own food, but not sure how?
Join Food Abundance Revolution and check out the Get-Started Garden 30-Day Challenge! In just 30 days you will discover the basic skills you need to grow food. Plus, get the Free Food Generator Bonus Module to learn how to turn you Get-Started Garden into a free food generating machine!
